
How to Set Up Google Analytics: A Step-by-Step Guide
After performing a website audit, the next step is to set up Google Analytics 4 on your website.
If you want to find out whether your business or blogging site is performing well digitally or not, insert a Google Analytics 4 code into it.
The Google Analytics 4 helps keep track of new and returning visitors to the website. It is an analytics platform that collects data from different sources and provides statistics for better analysis. Anyone with a Google account can use the service for free and it is a part of the Google Marketing Platform.
It allows businesses to track and measure the success of their marketing campaigns and the activities they perform to uplift their website performance. It further allows users to find patterns and trends in user engagement.
How does Google Analytics work?
Google Analytics collects user information from each website visitor using the page tags. Each page has a JavaScript page tag added to its source code. Every time a person accesses the website, this tag runs in their web browser, gathering information and transferring it to a Google data collection server.
Using configurable reports, Google Analytics may track and display information such as user counts, bounce rates, typical session lengths, sessions by channel, page visits, goal completions, and more.
A web bug or web beacon used on the page tags collects visitor data. The system, however, cannot collect data from users who have disabled cookies because it depends on them.
Why Setting Up Google Analytics Correctly Is Essential?
If you are one of those companies that rely on Google Analytics data to track their success and make marketing decisions, any mistake in setup error can cause a big problem. Misleading or inaccurate information can affect your business.
For most beginners, it can be challenging to find setup errors. But with the right guidance and expertise, you can spot and fix the error in real time.
Having Google Analytics set correctly helps make informed decisions. The correct setup helps collect accurate website traffic, user behavior, and other key metrics, such as bounce rate, number of visitors, conversion rates, etc.
You may even divide the audience of your website into several groups using Google Analytics, depending on different parameters like location, behavior, and demographics. With the right structure, you can correctly analyze these categories and adjust your content and marketing techniques to target particular audience segments.
Things to Consider Before You Set Up Google Analytics
Before setting up a Google Analytics Account, let us talk about the different versions available.
Google Analytics has two versions Universal Analytics (UA) and Google Analytics 4 (GA 4).
After the release of the new version, all the accounts will be created with the GA 4 property. UA is the old version with fewer features.
The current version GA4 comes with new features and functionalities. For example:
- Unlike UA, GA4 enables you to gather and analyze data for websites and applications that are part of the same property.
- GA4 measures page views and all other metrics as “events.” It only implies that they are measured in a different way. This does not imply that they are not being measured.
- Unlike UA, GA4 allows for unlimited free data collection. This can be a problem if there is a lot of traffic to your website (or if you think there will be in the future).
- Additionally, GA4 offers a number of sophisticated free capabilities that are exclusive to the commercial version of UA, which may be useful in the future.
Steps to Set Up Google Analytics
Let’s set up the Google Analytics Account and manually add the code to the site following these steps:
A. Create a Google Analytics Account
You must have a regular Google Account or Gmail account to create a GA account. If you don’t have a Gmail account, create one.
If you already have one, just sign in and go to the Google Analytics Homepage.
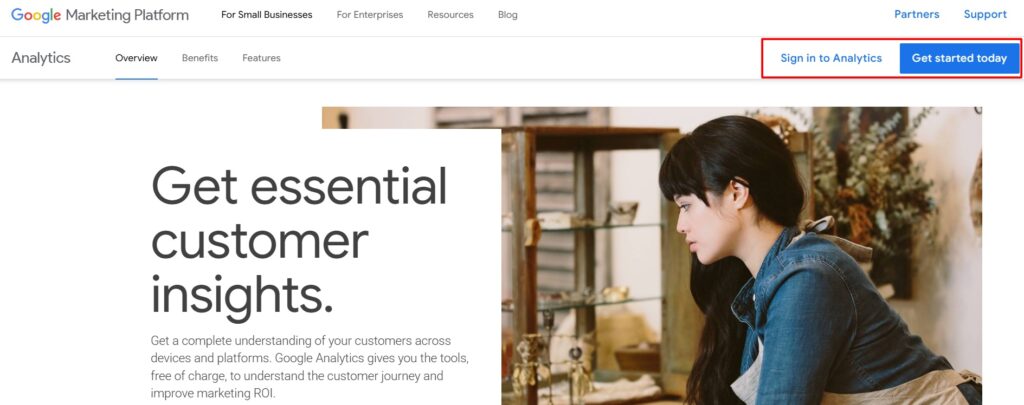
In the top-right corner of your screen, you will get the option to “Get Started Today”, click on it.
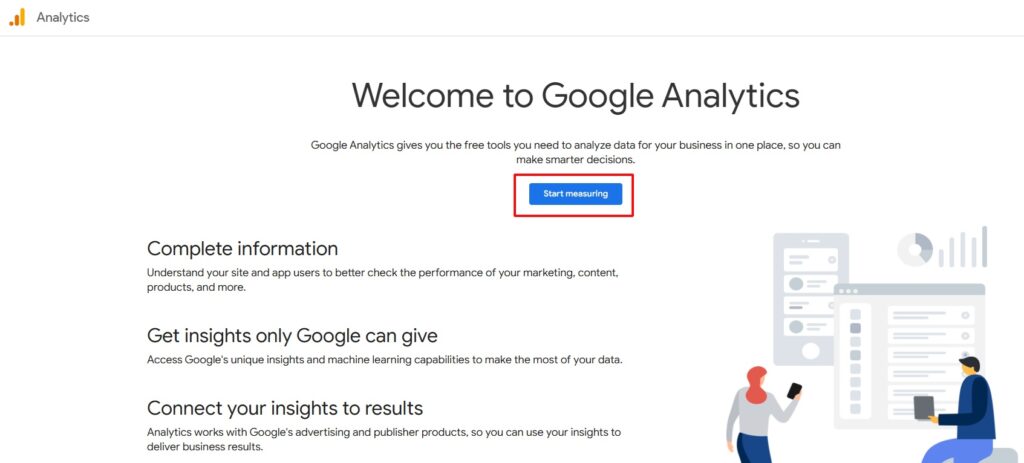
Once you click on it, you will be directed to the welcome page. To proceed further, click on the Start Measuring button that appears in the center.
After clicking on it, you will be redirected to the account creation page. Let us discuss the different sections that you must fill to start with the set up.
1. Account Name
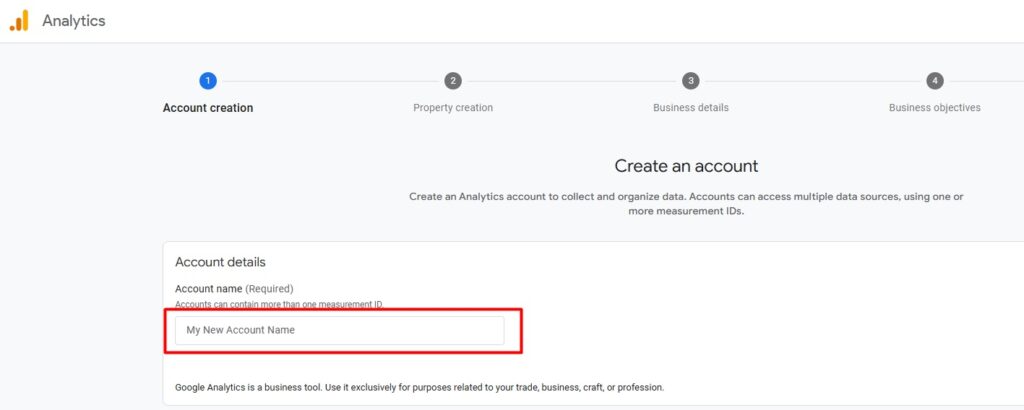
Every time you add a business, it will ask you to add an account name. Try to avoid adding the actual domain URL in this section. You can add your business name in this section. Adding a business name distinguishes between multiple accounts if you’ll be making them for different domains.
Let’s say, you run an ecommerce store that has region-wise subdomains. In this case, you can add your account name as The Web Store 27 (India), The Web Store 27 (USA), The Web Store 27 (UK), etc.
Below, you will get the opportunity to choose your data-sharing settings, which govern how Google will use the information you provide. Make sure to read these policies, and only choose the alternatives with which you are comfortable.
2. Property Name
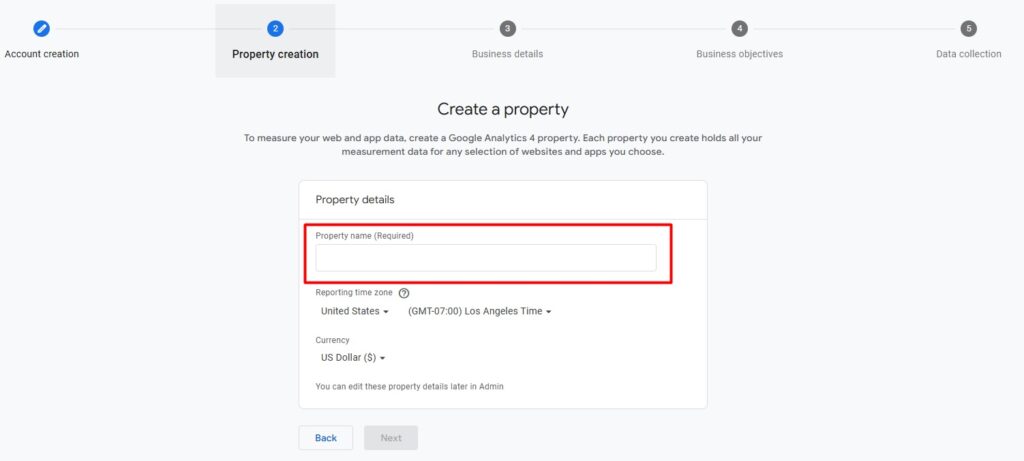
In Google Analytics, a “property” can be your website, blog domain, or an app. It’s crucial to keep in mind that your GA4 account may be connected to multiple of these properties.
For example, you have an app, website, and blogging site for your e-commerce portal. With a GA4 account, you can create all these properties in a single account. You don’t have to create separate account names for it. After creating the account name, you can add multiple properties like thewebstore27.com (website), blog.thewebstore27.com, or your app info as you want.
Type thewebstore27.com or thewebstore27 in the Property Name section.
Additionally, you will be prompted to select your preferred time zone and currency (you can alter these later if necessary).
3. Describe Business
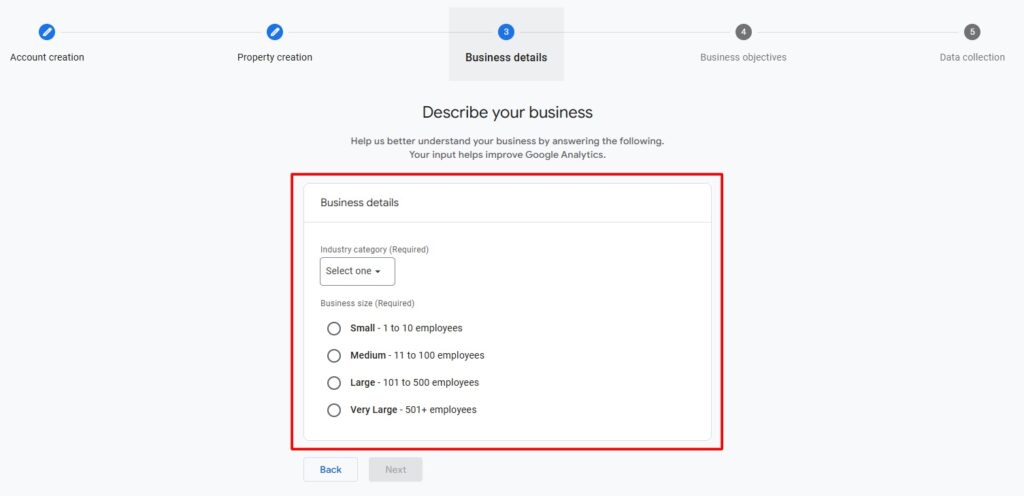
Now, you must fill in the Industry Category and Business size. Remember the details can be changed later without any hassle.
4. Choose your Business Objective
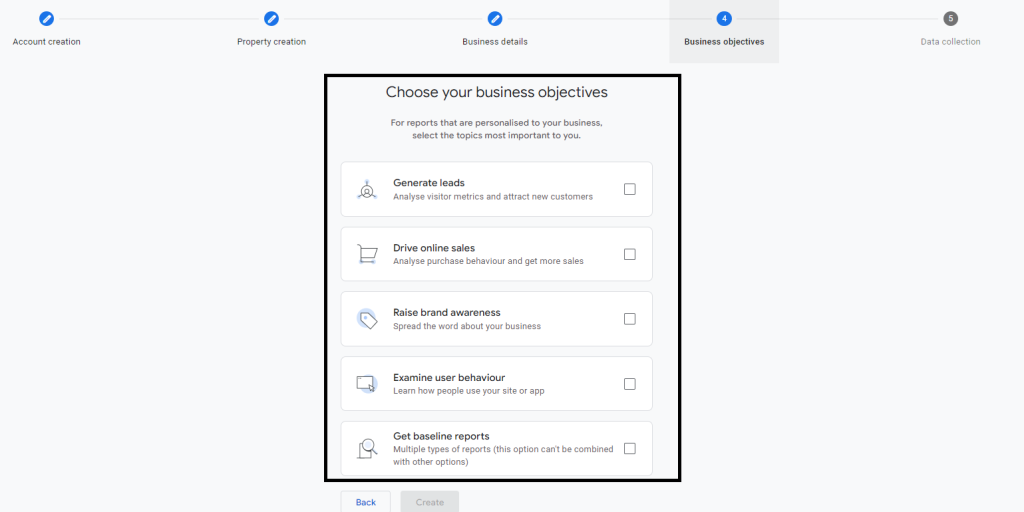
Here you need to set the purpose of creating a GA4 account. For example, do you want to keep track of your online sales, generate leads, examine the behavior of users, spread information about the business, etc. Tick the options you want to choose and press on the create button.
A pop-up will show up on the screen requesting to agree with the GA terms and conditions.
Make sure to select the correct location of your business and tick the agreement to proceed further.
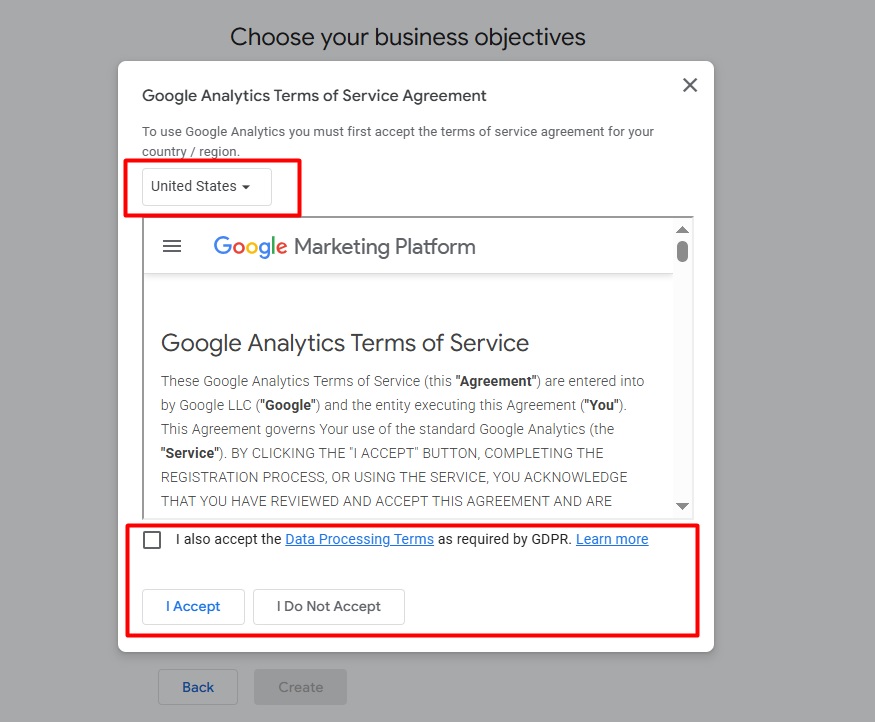
Once you agree to the agreement, your account and property are well created.
B. Set Data Stream
A data stream helps collect data from the source you choose. It lets information travel from the points where your users engage with your content to your analytics tools.
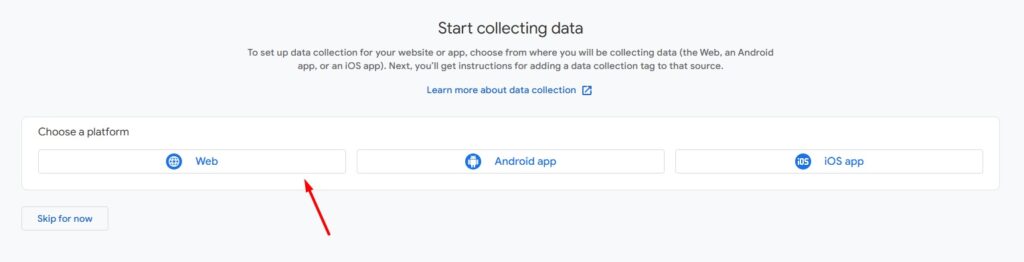
For example, if you want to track data on your website, click on the website section and fill in the required details. For app data collection, choose from the Android App or iOS app options available on the screen.
Since I want to collect data from my website, I’ll proceed with the web platform.
But stop! Before moving further, make sure to check you have selected the right account.
1. Website Details
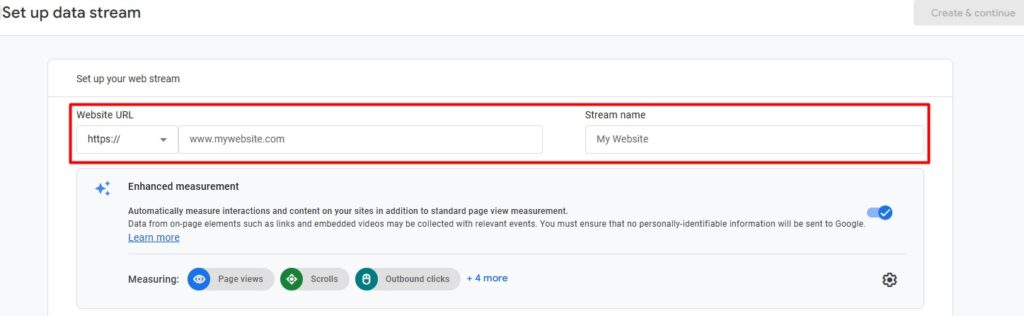
Add your domain URL and website name to the data stream. Remember, when you will be adding the website URL, there is an option to choose web protocol (i.e., HTTPS or HTTP). If your website does not have an SSL certificate and runs with URL https://thewebstore27.com make sure to choose http. However, if you have SSL and your site runs with www, then select HTTPS and paste www.thewebstore27.com in the provided section.
2. Enhanced Measurements
In addition to the “standard” metrics like page views, scrolling, and outbound clicks that are automatically assigned to track in GA4, there are a number of upgraded metrics as well. By choosing the tiny “Settings” icon at the bottom right, you may turn these measurements on or off and learn more about each metric.
Additionally, you are always free to modify these options.
Go to the admin section> Property settings> Data Stream
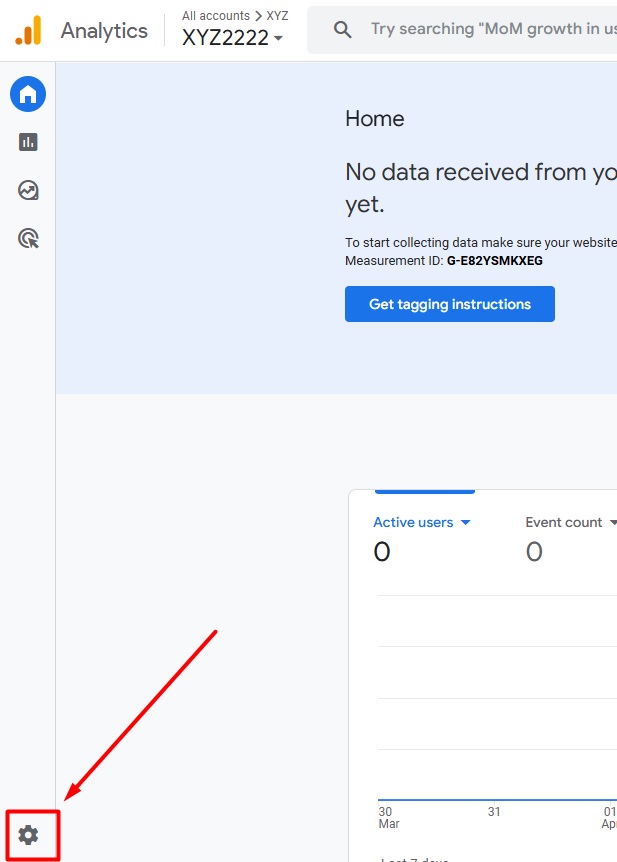
In the stream details, you will gain access to a unique measurement ID and a stream ID.
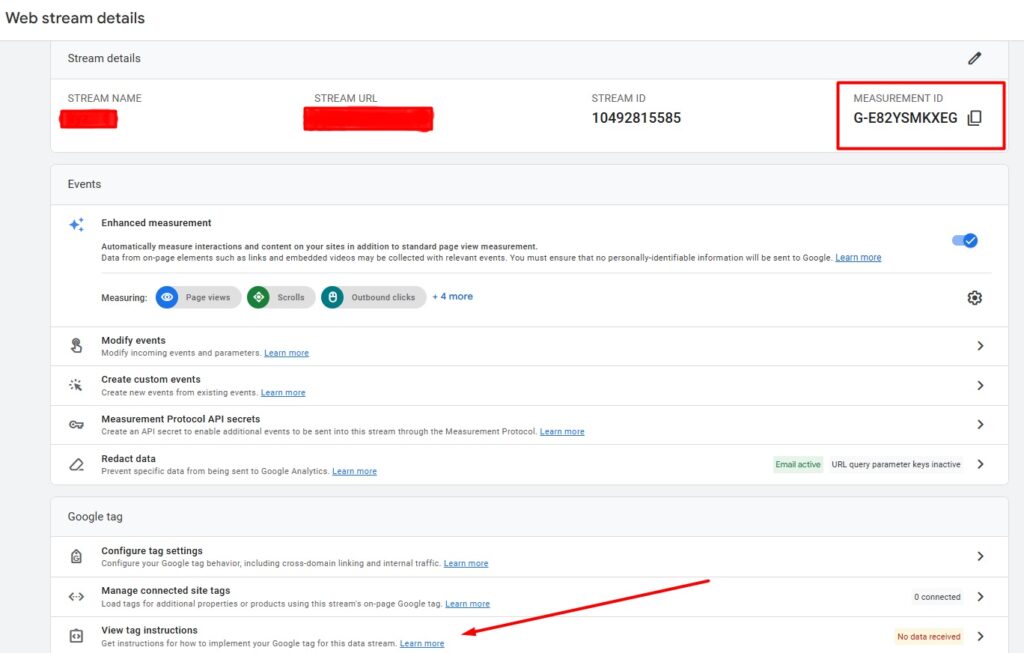
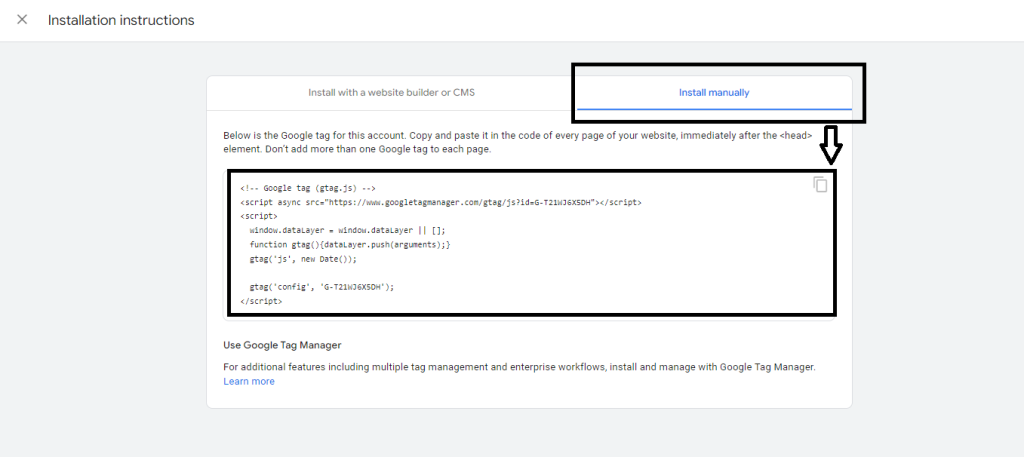
When you click on the View tag instructions, a code will be available to you. Click on the Install Manually option and copy the code.
C. Get Your Website to Start Collecting Data
Once you have generated the code, it is time to insert the code into the website so that you can all the metrics.
The setup process is already built into “build it yourself” CMS-hosted solutions like Wix or Google Sites if your site was made with one of them. According to the CMS provider you choose, the specific stages will vary significantly.
If you have your website on WordPress, copy the code from Google Analytics and go to the WordPress Dashboard.
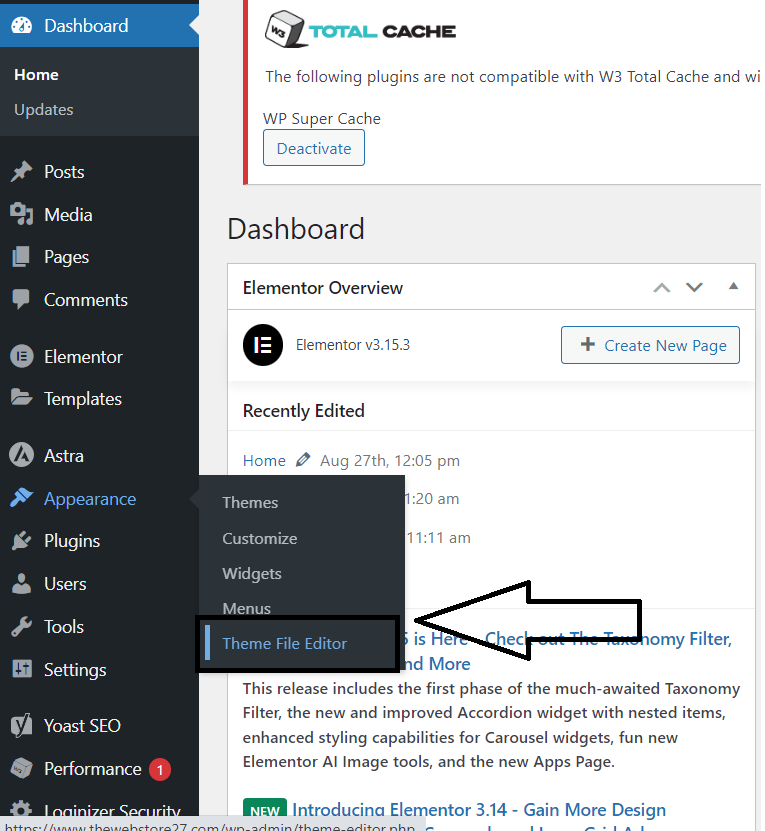
Go to Appearance> Theme File Editor
A new screen will open on the screen. Check in the right corner, you will gain access to various files. Scroll the list and select Theme Header.
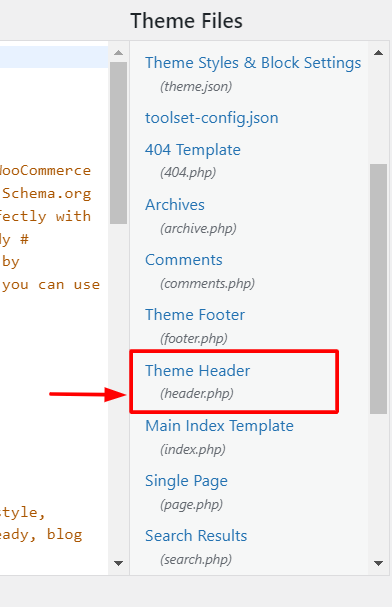
All the codes in the left panel will change. It will show all the content present in the Theme Header file.

Now paste your code generated from the Google Analytics account before the </head> tag.
Note: If you have no knowledge of coding and are not sure as to how to do it, consult your web developer for code insertion rather than doing it yourself.
You can also install the header and footer plugin and insert code.
No matter which technique you choose make sure to discuss with an expert before taking any major step.
For Wix and Google sites, you can even copy G ID and paste it into the settings as per the instructions by different platforms.
You must use the custom HTML function of the CMS you’re using to copy and paste the full global site tag if you’re using Weebly, Shopify, GoDaddy, or Squarespace.
There are other alternatives like Google Tag Manager or G ID that you can use to track user behavior and patterns.
We will discuss these alternatives in another post soon.
D. Check the Code is Working
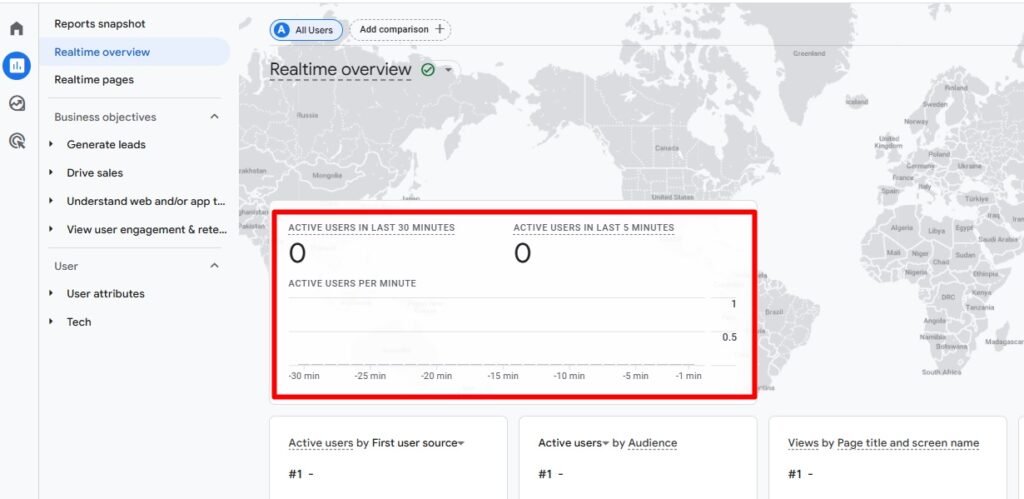
Once you have inserted the code into the website, go to your Google Analytics account and check if it is tracking users.
The “Users right now” card should update with a new user count every 15 seconds if everything has been done successfully.
You won’t be able to access any user behavior or acquisition statistics prior to Google starting to process the data for any other reports, which takes between 24 and 48 hours. Consult Google’s problems department if you still don’t see any data after this period.
Conclusion
In conclusion, appropriately configuring Google Analytics is essential to utilizing data-driven insights, optimizing the performance of your website, and making wise decisions for your company or online presence. It makes sure you have access to reliable and pertinent data so you can continually enhance your online tactics and accomplish your objectives.
Follow for more SEO related blogs and latest updates.